Son of chef

Son of chef
Fair food

Monday, October 28, 2013

Ketchup Haters Unite!!

I love food.  I love to eat.  I love the way just hearing the name of a food makes you want to hop right into the kitchen and whip it up.  Foods like silky chocolate mousse, cinnamon roll pancakes, vanilla peach coffee cake.  Don't those all sound good enough to eat?  Then there is meatloaf.  Really, this is what they call it?  Loaf of meat.  Well that does not sound appetizing to me.  I don't know if that is why I have always had an aversion to eating it, or if it is because most people make it with ketchup.  My nemesis.  I will not eat it, I won't dip a fry in it, not in a box, not with a fox, and especially not on a loaf of meat.  Some people say they only like their mom's or their grandma's.  Nope.  Still not buying it.  Well somehow, my sister (the most annoyingly picky eater ever) loves meatloaf!!  So, when she suggested I make it for my blog, I cringed.  If you know me, I never turn down a challenge.  So I took the basic meatloaf my grandmother bakes and I added all of my favorite things to it.  Bacon and cheese of course.  Since I can't bear the thought of ketchup, I used BBQ sauce instead.

Big K's BBQ Bacon Meatloaf
Serves 8

2         Pounds        Lean Ground Beef, I used 93/7
2         Each            Eggs
1/2      Cup             Bread Crumbs, I used Panko Japanese Breadcrumbs
1         Each            Green Bell Pepper, Diced
1         Each            Small White Onion, Diced
4         Slices           Bacon, Cooked and Chopped
1         Cup             Shredded Cheddar Cheese
1/2      Cup             Cup BBQ Sauce plus 1/2 Cup for Brushing on Top
1         16 oz           Ranch Dressing Dry Mix Package
1         T                 Worcestershire Sauce
1         T                 Dijon Mustard

Preheat oven to 350 degrees.  In a large mixing bowl mix all of the ingredients except beef and extra BBQ sauce.  Next stir in the beef with your hands.  Yes, your hands!  Next line a baking sheet with foil.  Spray it with baking spray.  Place mixture onto the pan and shape it firmly into the shape of a loaf, or you can use a loaf pan if you like.  I like doing on the baking sheet so I can make it a little longer and it makes 8 perfect slices.  Brush meatloaf with extra BBQ sauce.  Place meatloaf  in the oven for  50 minutes.  Take it out and let it rest 15 minutes.  Slice into 8 equal slices.  Serve it up with mashed potatoes or macaroni and cheese and some steamed veggies.  If you must you can use ketchup.  I guess...  Love as Always, "Big K"


Tuesday, October 22, 2013

Cookies for Dinner??

If I had my way I would eat chocolate chip cookies for dinner every night.  Oh, or chocolate cake.  Or Oreos.  Okay, you get the gist.  Apparently, doing this isn't especially good for your figure.  I have mentioned before that I worked at a bakery for a little while after my son was born.  They had these fantastic cookies that were so soft they melted into my mouth and straight onto my thighs!  The combo of "broken cookies" that were fair game for employees to eat, and the "baby weight" had put a few extra pounds on me.  After realizing that this was not the best diet to have I started eating much healthier.  My sister and mom were still eating over a lot and I wanted to make healthy still be tasty.  My mom often tries these crazy diets where you have to drink shakes or cut out certain things.  This doesn't ever work for me.  Cut out sugar?  You can forget that!!  Cut out carbs?  Hand me a potato stuffed with bread.  I found that cutting the portion size down and choosing healthier options is what I could stick with.  If you have read any of my previous recipes, they are certainly not super healthy, so I will try to start putting some of my healthier creations in as well!

Shrimp and Avocado Salad with Cilantro Lime Dressing
Serves 4

1        Pound        Large Shrimp, Peeled & Deveined, Leave the tails on
1        Tbsp          Salt
4        Cups          Water
1        Each           Bay Leaf
2        Each           Lemons, Cut in half
1        Large         Avocado
1        Pint            Grape Tomatoes
16      Each          Cilantro Leaves

For the Dressing:
1/2     Cup            Light Sour Cream
1/2     Cup            1/3 Less Fat Cream Cheese
1/4     Cup            Green Onion, Chopped
1/2     Cup            Fresh Cilantro
2        Each           Limes, Juiced
1/2     Tsp             Salt
3        Each           Garlic Cloves

In a medium sized sauté pan with a lid, combine the water, bay leaf, and salt. Squeeze the lemon halves over the pot and then drop in the halves. Bring to a boil, reduce heat to medium low, and let simmer for 10 minutes. Add the shrimp, cover, and poach for 4 min. Turn off the heat and let the shrimp sit in the covered pan for another 2 min. Drain shrimp in a colander.  Toss a tray of ice cubes on top of the shrimp.  Toss the ice and shrimp every 2 minutes until they get cooled through.  Pull the shrimp out and lay on a paper towel to drain any excess ice/water.  Next slice the avocado in quarters lengthwise.  Peel off the skin.  Then slice each quarter into four slices.  Slice the tomatoes lengthwise.  For the dressing put all in the ingredients in the blender and .  It will look like ranch.  On four plates equally divide the avocado and shrimp and fan out. Sprinkle the tomatoes and cilantro on top and drizzle with the dressing.  Serve cold.  Goes great as a light dinner or served as a appetizer or salad.  Love as Always, "Big K"  


Wednesday, October 16, 2013

Fall Foodie Part 2

Zombies, Mummies, and Monsters, Oh My!!  I know that I have mentioned how much I love fall, but I love fall.  Especially October.  Halloween has always been one of my favorite holidays to celebrate.  I already bought pumpkins to adorn my garden, my son picked out his Halloween costume (Spider-man of course), and we are taking him to a pumpkin patch this weekend!  I also can't wait to take him trick-or-treating!  My mom always took my sister and me every year, rain or shine.  One year I remember she was going to take us, but still wanted to hand out candy, so she put a huge bowl of candy on the porch with a sign that said "just take one".  As we were crossing the street, a truck with a bunch of teenagers in the back, jumped out grabbed the bowl and sped away with all the candy!  Now that I have a son of my own, my mom and sister always come with us and we laugh about that.  Before we go out into the streets to ask strangers for candy, I started the tradition of having a pot of apple cider and a loaf of pumpkin bread to snack on before we go.  I came up with my own version of pumpkin bread made with greek yogurt and swirled with some pumpkin cream cheese!  After a few tries it turned out fantastic.  Perfect for a fall treat and it makes my kitchen smell amazing. This puts the treat in trick or treat!

Pumpkin Cream Cheese Swirl Bread

1          Each         Stick of Butter
1          Cup          Brown Sugar, Packed
1/2       Cup          Granulated Sugar
2          Each         Eggs
1/2       Cup          Vanilla Greek Yogurt
1         15 oz         Can of Pumpkin
1         Tsp           Vanilla Bean Paste or Extract
2 1/2   Cups          All Purpose Flour
2         Tsp           Baking Soda
1/2      Tsp           Salt
1         Tsp           Ground Cinnamon
1         Tsp           Pumpkin Pie Spice
1         8 oz          Container of Pumpkin Cream Cheese
2         Tbsp         Powdered Sugar

Preheat your oven to 350 degrees.  In a stand mixer with the paddle or in a large bowl with a hand mixer, cream together sugars and butter for 3 minutes until fluffy.  Then mix in eggs, pumpkin, yogurt and vanilla until well incorprated.  In a separate bowl, stir together flour, baking powder, salt, cinnamon, and pumpkin pie spice.  Slowly mix the flour mixture into the wet mixture just until it comes together.  Do not over mix, this can make your bread tough.  In a small bowl stir together cream cheese and sugar.  Next take a loaf pan and spray it with cooking spray and sprinkle with about a 1/4 cup of flour.  Shake the flour around evenly then tap off any extra flour.  This will help your bread slide out easily and not stick.  Pour the bread mixture in the loaf pan.  Take a spoon and dollop the cream mixture on top.  Using a toothpick swirl the cream cheese into the top of the bread.  Bake it in the oven for an hour.  Test it with a toothpick to make sure it comes out clean. Let it cool for an hour before taking it out of the pan.  Let it cool completely before you slice it.  Love as always, "Big K"

Big K's Tips:

*   I also tried this in four mini loaves and it turned out great

*   I don't use vanilla greek yogurt very often so I used the individual serving cup that was 5.3 ounces and it worked just fine

*  If you can't find the pumpkin flavored cream cheese, you can substitute regular


Tuesday, October 8, 2013

Cheley Mac

If you watched the news much at all in September, you saw all the flooding that devastated many parts of Colorado.  One of the towns that was affected holds a special place in my heart.  Estes Park, Colorado.  It is the headquarters for the Rocky Mountain National Park, a popular summer resort, and the home of Cheley Summer Camps.   Cheley is a sleep away summer camp for both girls and boys.  There are two sessions, each lasting 27 days long.  I went three summers in a row and did one session each time.  As a teenager this seemed like a long time away from home, but was the most amazing adventure I could have asked for.  During this time there are daily activities including: hiking, backpacking, mountain biking, horse back riding, rock climbing, fishing, and riflery.  The camp was divided between boys and girls.  The girls camp was called Senior Chipeta.  This was a large campground filled with cabins, each housing about 12 girls.  I had the most amazing summers at this camp.  I challenged myself physically, made a ton of life long friends I still keep in touch with, and got to live in the mountains away from my parents learning how to take care of myself.  We had counselors who guided us and taught us how to do these activities and how to respect the wildlife and each other.  For meals, there was a large dining hall that we would all gather at for breakfast lunch and dinner if we were not out on the trails.  The food was actually fantastic though you wouldn't expect that from a cafeteria.  We had something different every day.  I do not remember every meal I had there, but I do remember a few.  One was the chicken tetrazinni.  They called it Chicken Ta-Ta for some reason (I never knew why) and it was a creamy concoction of chicken, spaghetti, mushrooms, and cheese.  The second was Chili Mac.  It was like chili and macaroni & cheese mixed together!  It was especially delicious on a cool night after hiking up and down mountains all day!  I have over the years come up with my own version to eat on a nice cool evening and think of all the wonderful memories I made at Cheley.


Cheley Mac
Serves 6

1       Pound            Ground Beef
1       Each              Small White Onion, Diced
1       Each              Green Bell Pepper, Diced
3       Each              Garlic Cloves, Minced
1       28 oz Can       Crushed Tomatoes
1       15 oz Can       Tomato Sauce
2       Cups              Water
2       Tbsp              Chili Powder
1       Tbsp              Garlic Powder
1       Tbsp              Paprika
1       Tsp                Dried Oregano
1       Tsp                Ground Cumin
2       Tsp                Salt
1       Pound             Velveeta Cheese, Cut into Cubes
2      Cups                Large Elbow Macaroni (It Must be LARGE!!  Because I said So!!)

In a dutch oven or large pot, brown the beef, let drain.  While draining add to the pot the onion, pepper, and garlic and saute for 5 minutes.  Add in the beef, tomatoes, water, and seasonings.  Bring this to a boil.  Let boil for 2 minutes, then reduce to a simmer.  Simmer for 20 minutes.  Add in the noodles and cover pot.  Simmer on lowest heat for 30 minutes.  Turn off heat, add in cheese.  Let sit 15 more minutes.  Stir to mix in the cheese, then serve hot.  I top mine with cheddar, sour cream, and sliced green onion!  Love as Always, "Big K"


Wednesday, October 2, 2013

An AfFAIR of the Heart Attack

Deep Fried.  Bacon Wrapped.  Everything.  "Yes, Please"  Once a year it comes here.  To the great state of Oklahoma.  If you live here, you already know what I am talking about.  If not, you are missing out.  Ten days of people watching, craft shows, animal shows, rides, games, and miles of FOOD!  My family has been going every year since I was a kid.  My sister and I showed Morgan Horses and every year the State Fair had a show that was a qualifier for the National competition.  In between our classes, we would walk to our favorite food vendors to eat.  As we have grown through the years we go back and eat those same favorites.  The last few years, the fair has added some crazy new foods.  Such as deep fried butter, chocolate covered bacon, and deep fried coca cola.  This year we decided to branch out and try some of those new foods so we could compare them to our stand by favorites.

 
For the Experiment:

The Usual Suspects:

The Indian Taco:  A puffy indian fry bread topped with taco meat, beans, lettuce, onion, tomato, and cheese.  Big enough for two (and a toddler) to share.


Wisconsin Fried Cheese:  Mozzarella, Cheddar, or Jalapeno Cheddar dipped in a light fluffy batter and fried to perfection.  Served with ranch and marinara.  The ultimate cheese stick.
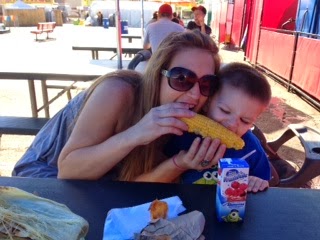
Giant Corn on the Cob:  Imagine the biggest corn on the cob of your life.  Grill it over a big open fire than dip it in the melted butter.  It is a buttery, smoky, delicious way to enjoy a veggie in a sea of bacon and cheese.


Root Beer Jug:  A pint sized milk jug filled with icy cold root beer.  Perfect to wash down all the awesome food.


The New Guys:

Chocolate Covered Bacon:  Definitely worth a try.  A little to rich for us.  We liked the idea of sweet and salty, but the ratio was off.  Needed more bacon, with a thinner coating of chocolate.


Fried Cheese Curds:  We tried the jalapeno.  Compared to the Wisconsin cheese it had a much thicker batter.  Not quite as gooey and cheesy.  We enjoyed them, but we still prefer the Wisconsin cheese.


Brisket Chimichanga Topped with Queso:
Out of all of the new foods we tried this was our favorite.  They had a 2 for 1 special, so it was a great bargain.  It was a tortilla filled with BBQ brisket and cheddar, deep fried and topped with queso.  Very good combination.


We had a great time searching out and trying new things. The next weekend, we did sneak back to get all of our old faithfuls.  We realized sometimes your old favorites are the way to go.

For my recipe I was a little fried out!  So I made a oven baked version of fried pickles.  I got the crispiness of being fried without all the fat.  So through out the year I can have my Fair favorites in a healthier way.  Enjoy!

Baked "Fried" Pickles
Serves 6

1      Each      24 oz Jar Whole Kosher Dill Pickles, sliced into desired thickness
2      Cups      Buttermilk
1      Cup       All Purpose Flour
2      Cups     Panko Japanese Style Bread Crumbs
1      Tsp       Salt
1/2   Tsp       Pepper
1      Tbsp     Cajun Seasoning
1/4    Cup      Olive Oil

Take 2 large zip-loc bags.  Preheat oven to 400 degrees.  Take a baking sheet and line it with foil.  Evenly pour the olive oil on the pan.  In one of the zip-loc bags pour in the buttermilk.  Put the sliced pickles in with the buttermilk.  Shake it up and let it sit in the fridge for about 20 minutes.  In the second bag pour in the remaining ingredients.  Take the pickles and drain the excess buttermilk.  Toss the pickles in the bag and shake until well coated.  Pop your prepared pan in the oven for 5 minutes to heat oil.  When you take it out evenly place the pickles carefully in the hot oil.  Then put the pickles in the oven for 10 minutes.  Take them out turn them over and place back on for 10 minutes or until golden and crisp.  Serve hot with ranch.  Love as Always, "Big K"